Quick Start
Get Chief running in under 5 minutes.
Prerequisites
Before you begin, make sure you have:
- An agent CLI installed and authenticated. Chief supports:
- A project you want to work on (or create a new one)
Verify your agent CLI is working
Run the version command for your agent to confirm it's installed:
claude --version(Claude Code)codex --version(Codex)opencode --version(OpenCode)agent --version(Cursor CLI)
Step 1: Install Chief
Choose your preferred installation method:
brew install minicodemonkey/chief/chiefcurl -fsSL https://raw.githubusercontent.com/minicodemonkey/chief/main/install.sh | bashgit clone https://github.com/minicodemonkey/chief.git
cd chief
go build -o chief ./cmd/chief
mv chief /usr/local/bin/Verify the installation:
chief --versionStep 2: Create Your First PRD
Navigate to your project directory and create a new PRD:
cd your-project
chief new
This launches your agent CLI with a preloaded prompt. Work with the agent to describe what you want to build—your project goals, user stories, and acceptance criteria. The agent will help structure your requirements and write the prd.md file.
When you're done, type /exit to leave the agent session. Chief validates the markdown structure can be parsed:
prd.md- Structured PRD with freeform context and user stories (written collaboratively with the agent)
Iterating on your PRD
Run chief edit to reopen the agent and refine your prd.md. Chief will validate the structure when you /exit.
Step 3: Launch the TUI
Launch Chief's Terminal User Interface:
chiefOn first launch, Chief prompts you to configure a few settings:
- Post-completion automation — Whether to automatically push branches and create PRs when a PRD completes (recommended: Yes for both)
- Worktree setup command — A command to run in new worktrees (e.g.,
npm install). You can auto-detect, enter it manually, or skip
These settings are saved to .chief/config.yaml and can be changed anytime via the Settings TUI (press ,).
Step 4: Start the Loop
Press s to start the Ralph Loop. Chief will offer to create a worktree for isolated development, then begin working through your stories automatically.
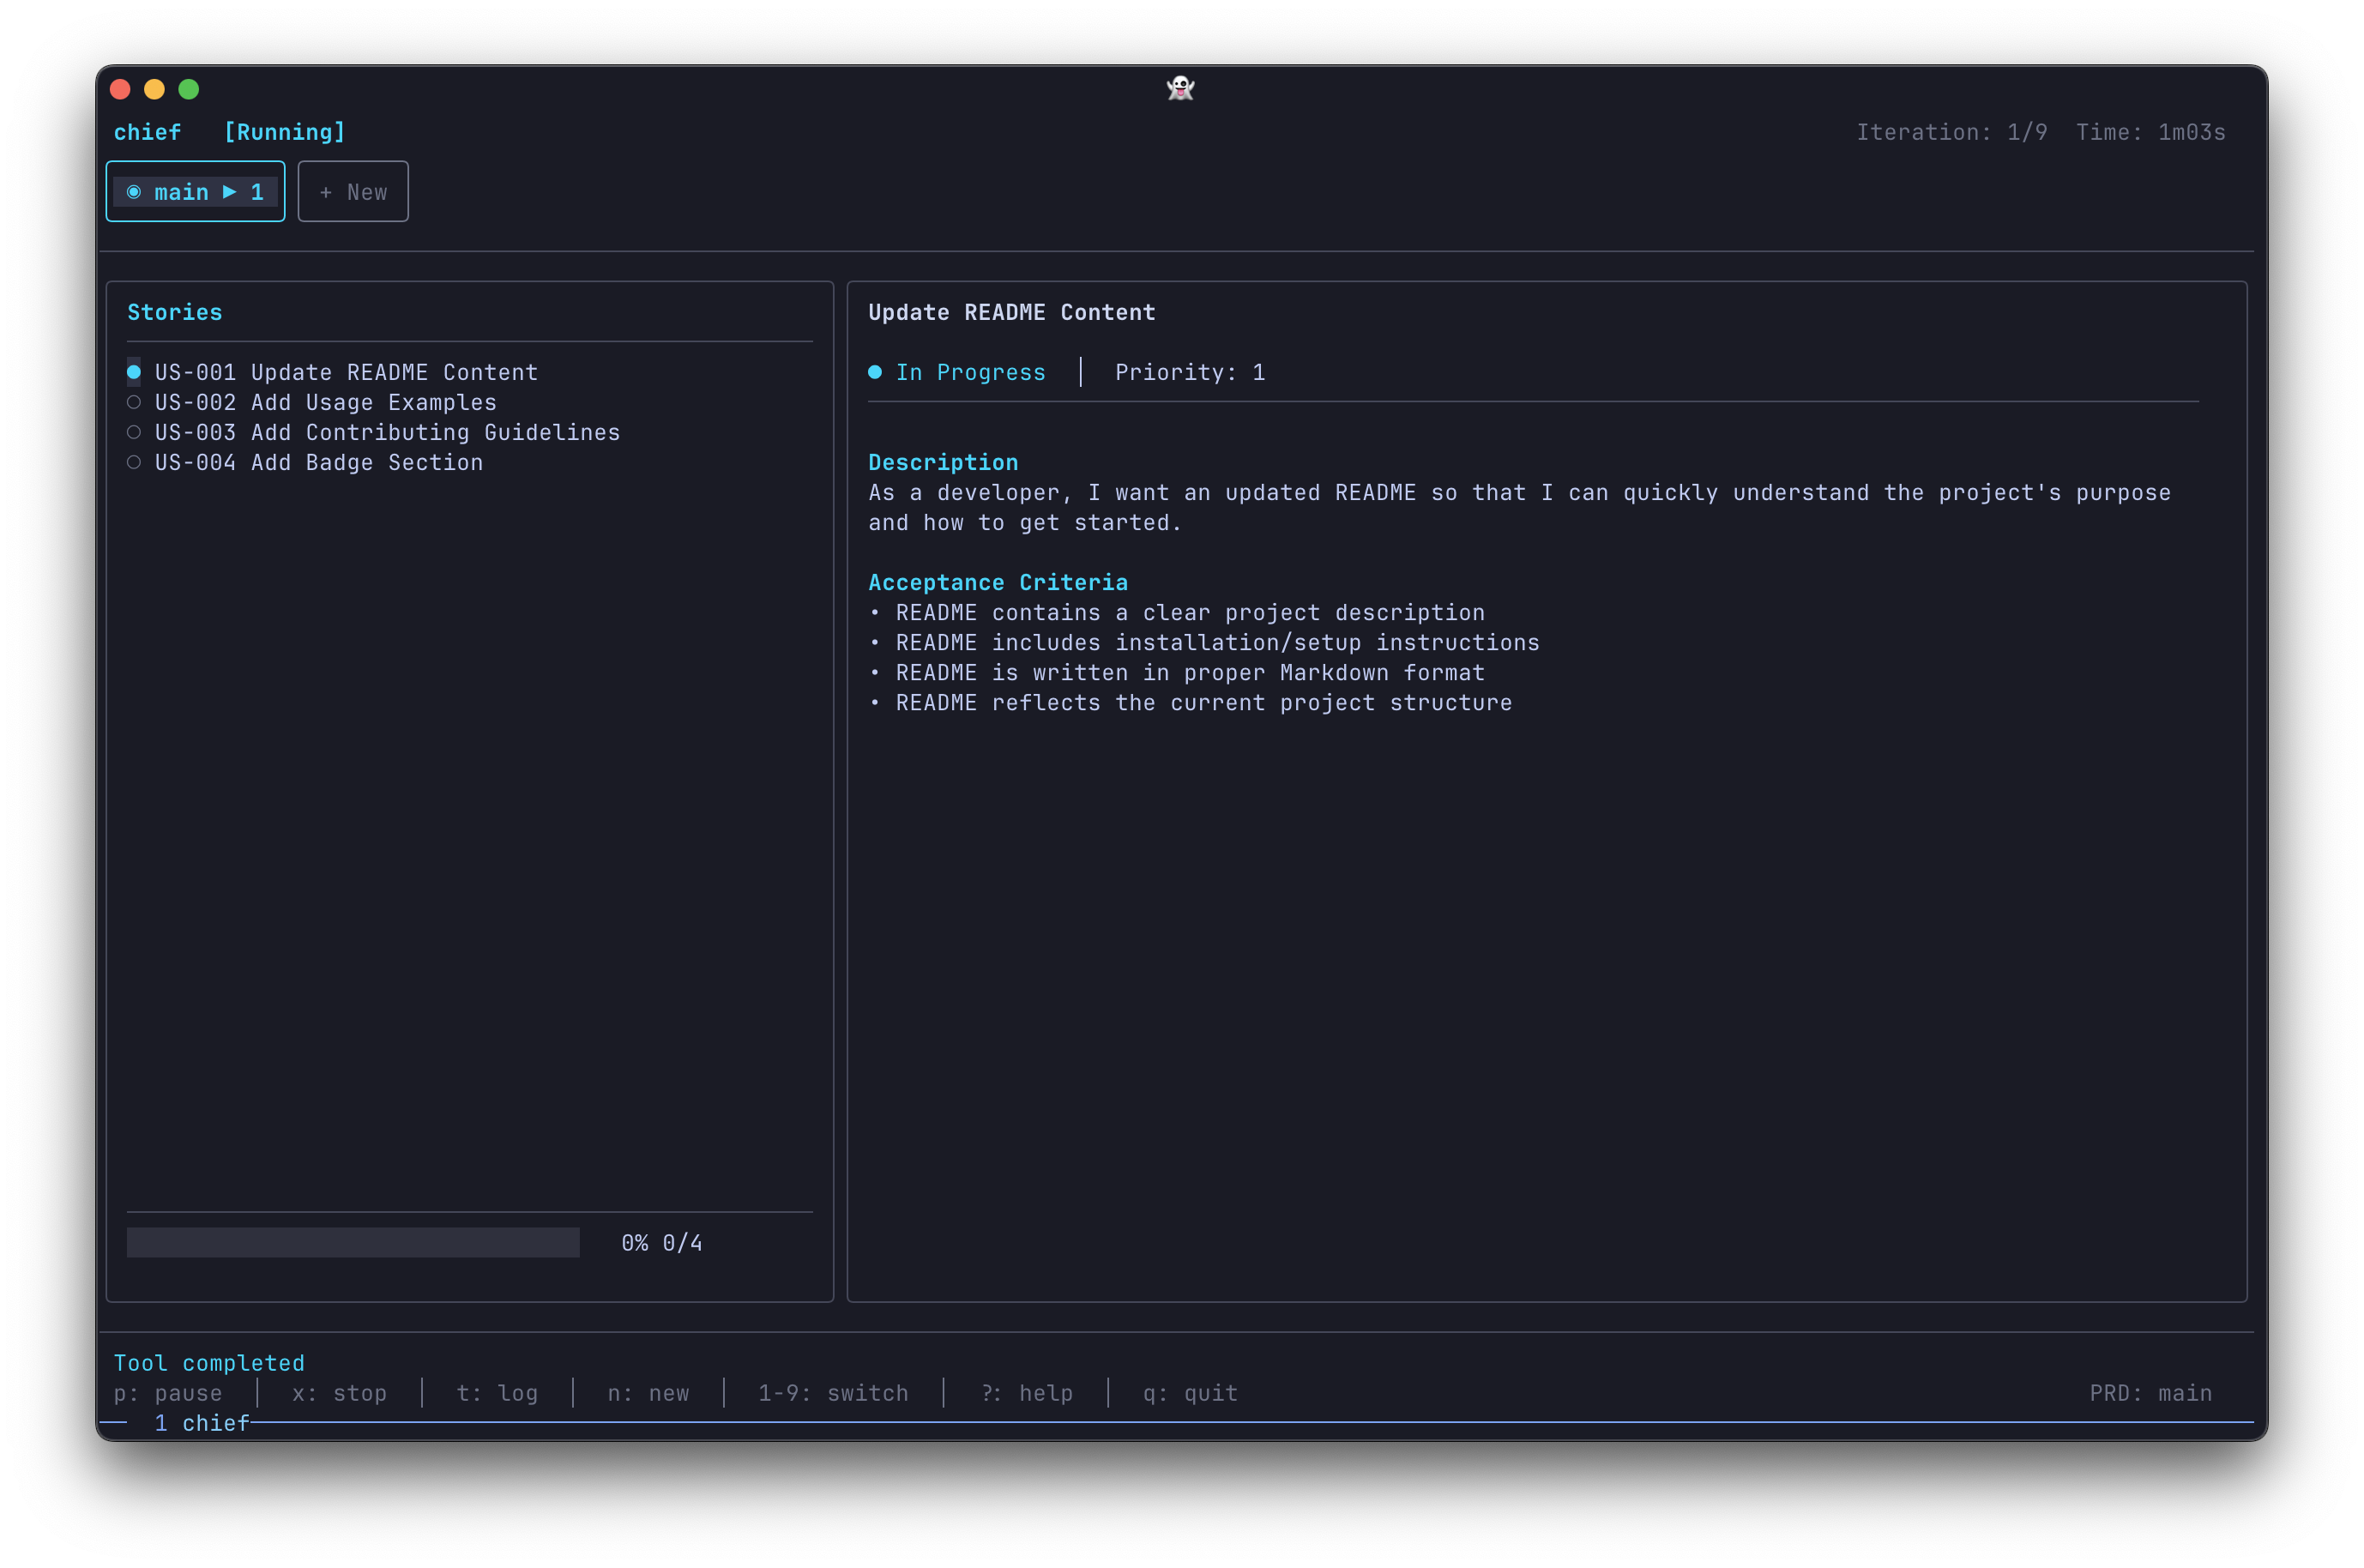
The TUI shows:
- Tab Bar — All your PRDs with status indicators
- Stories List — User stories with completion status
- Story Details — Current story's description and acceptance criteria
- Live Activity — Real-time status updates from the agent
- Diff View — Press
dto see the commit diff for the selected story
Keyboard Controls
| Key | Action |
|---|---|
s | Start the loop (when Ready, Paused, Stopped, or Error) |
p | Pause the loop (finishes current iteration) |
x | Stop the loop immediately |
t | Toggle between Dashboard and Log views |
d | Diff view — show the selected story's commit diff |
n | Open PRD picker to create or switch PRDs |
l | Open PRD picker in selection mode |
e | Edit current PRD |
1-9 | Quick switch to PRD tabs 1-9 |
j/↓ | Navigate down (stories or scroll log/diff) |
k/↑ | Navigate up (stories or scroll log/diff) |
PgDn / Ctrl+D | Page down (log/diff) |
PgUp / Ctrl+U | Page up (log/diff) |
+/- | Adjust max iterations |
m | Merge completed branch (in picker) |
c | Clean worktree (in picker) |
, | Open Settings |
? | Show help overlay |
q | Quit Chief |
Hands-off operation
Once started with s, Chief runs autonomously. You can watch the progress or walk away—it will complete your PRD while you're gone.
What's Next?
Now that you've run your first Chief loop, explore these resources:
- Installation Guide - Detailed installation options for all platforms
- How Chief Works - Understand the autonomous loop
- The Ralph Loop - Deep dive into the execution model
- PRD Format - Write effective PRDs
- CLI Reference - All available commands and options